Apps
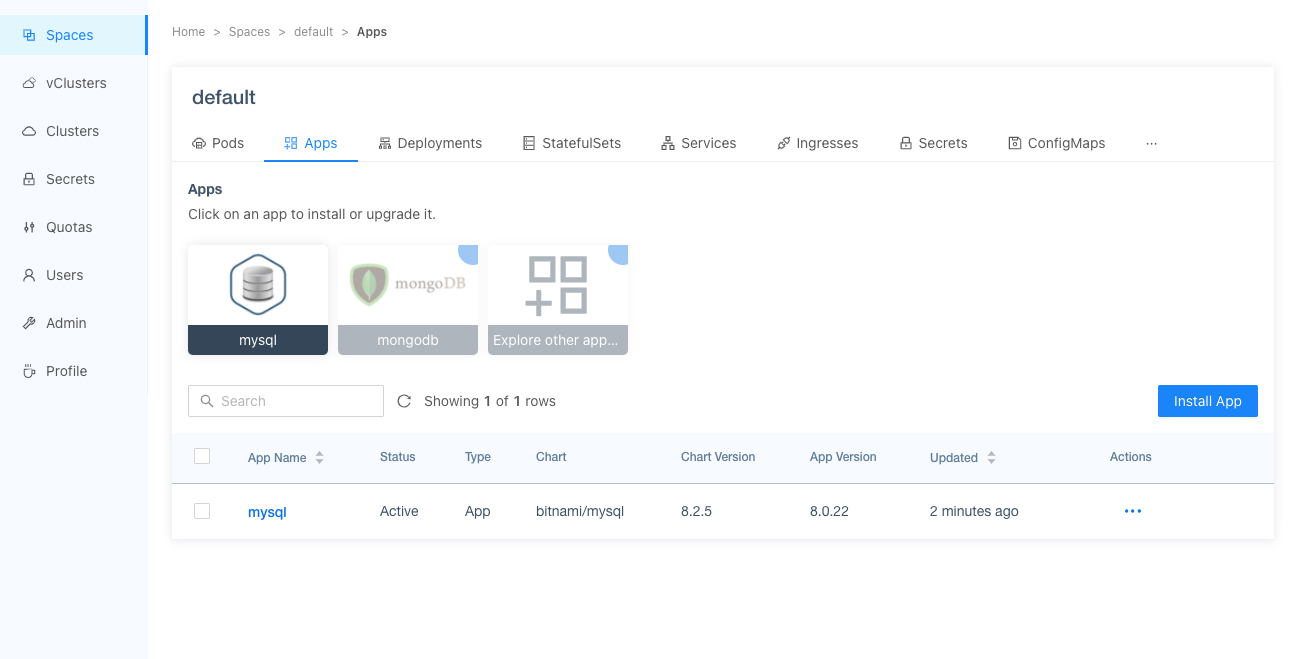
Apps are Helm charts from Helm repositories or Kubernetes manifests that are deployed as Helm charts which you can manage via Loft. Apps can be managed in the loft UI in the Apps view and installed into a space (Spaces > Apps), virtual cluster (Virtual Clusters > Apps) or directly into a cluster (Clusters > Apps).
Apps can also be installed automatically through virtual cluster templates or space templates.

Apps Authorization
Loft will install apps by impersonating the user that wants to install the app, which means that if the user is not allowed to install certain resources (e.g. ClusterRoles), the user also won't be able to install an App that contains such resources.
By default, all users that have admin access to a space are able to install apps into that space limited by their RBAC rights. To disable this, remove the RBAC rights for helmreleases in the cluster role loft-cluster-extra-space-admin-rules.
Types of Apps
System Apps
System apps are Helm charts which are installed into the cluster by Loft during the cluster initialization process, i.e. right after connecting the cluster. These apps are managed and upgraded by Loft. You cannot delete or upgrade them manually because this would impact Loft's ability to manage the cluster. Currently, only loft-agent is a system app.
Other Apps
In addition to your custom apps, Loft has the most commonly used Helm Charts already predefined which makes it easy to install over 1,200 Helm charts with just a few clicks.
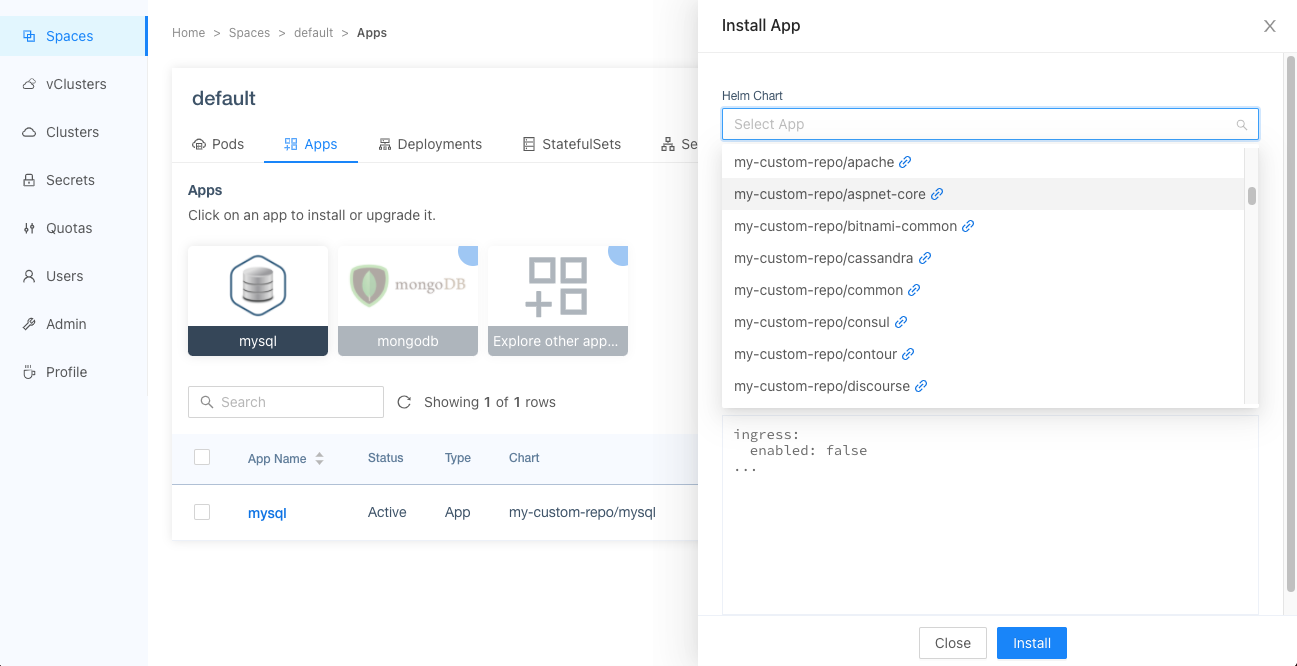
Recommended Apps: Apps that are marked as recommended app will show up in one of the apps views Other Apps: To install other apps, click on "Explore other apps" and use the searchable select to find charts.
To customize what Apps should be available, take a look at the create app or customization section below.
Workflows
Define a new App
Apps can be created either through the Loft UI or kubectl.
- UI
- kubectl

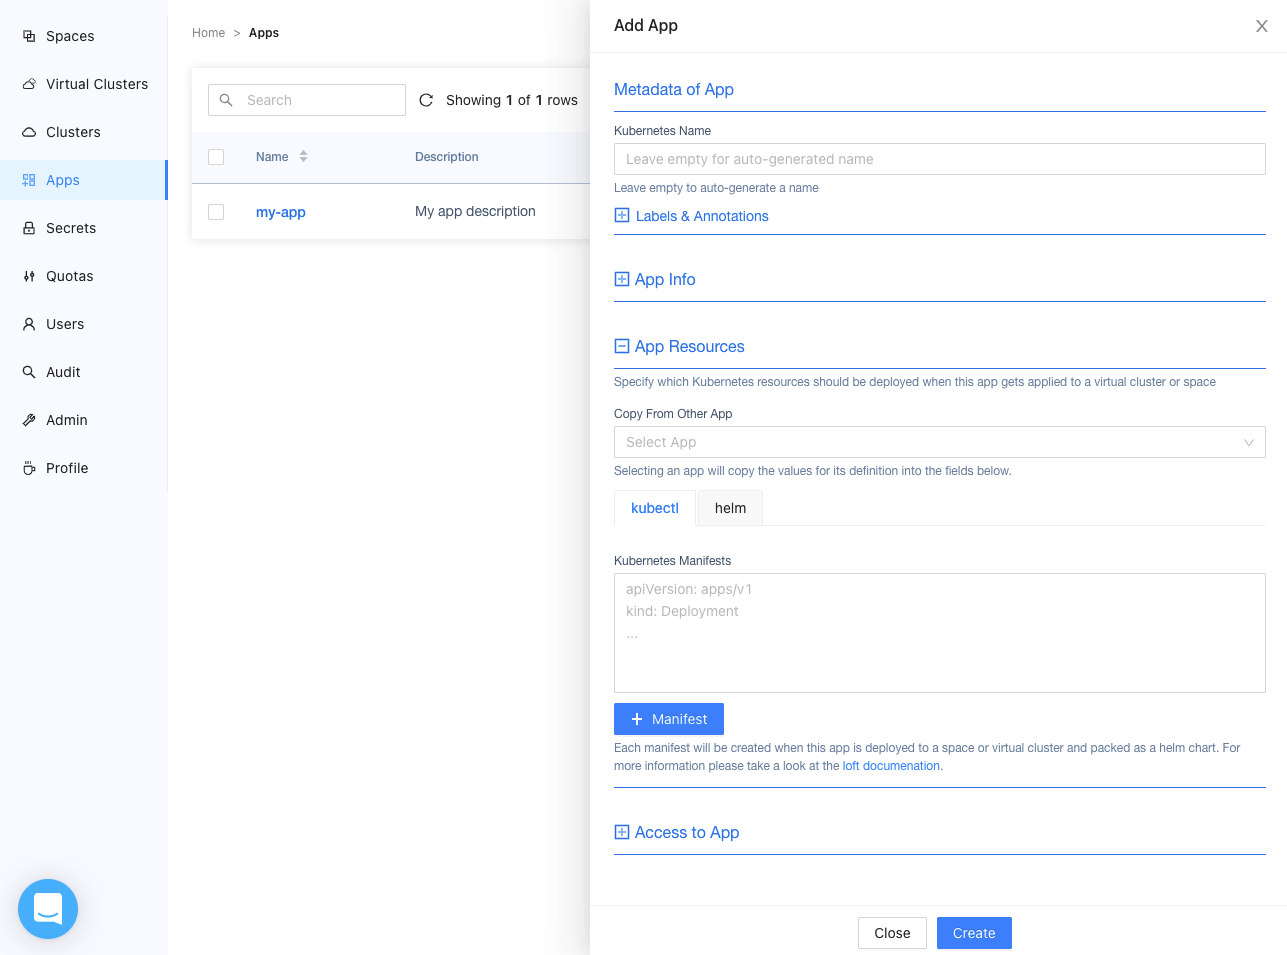
Navigate to the Apps view and click on 'Add App' button. You can configure the following options in the app drawer:
- Metadata: name of the app that will be used to display the app in other views
- App Info: icon that is shown if the app is installed as well as a short description and if the app should be shown as recommended app in the Cluster, Space or Virtual Cluster App view
- App Resources: the actual Kubernetes objects that should be installed by this app. This can either be plain Kubernetes objects or a helm chart:
- Kubernetes objects: Plain yaml definition of objects that should get deployed into the space or virtual cluster. Since Loft will wrap those resources in a Helm chart, you can actually use helm templating syntax in those resources, such as
{{ .Release.Namespace }}. - Helm chart: Definition of a helm chart to deploy as well as the default values to use
- Kubernetes objects: Plain yaml definition of objects that should get deployed into the space or virtual cluster. Since Loft will wrap those resources in a Helm chart, you can actually use helm templating syntax in those resources, such as
- Access To App: additional users and teams that should be able to access this app object in addition to all existing RBAC rules. As soon as the user or team can view the app they will be able to install an app
Apps Authorization
Loft will install apps by impersonating the user that wants to install the app, which means that if the user is not allowed to install certain resources (e.g. ClusterRoles), the user also won't be able to install an App that contains such resources.
By default, all users that have admin access to a space are able to install apps into that space limited by their RBAC rights. To disable this, remove the RBAC rights for helmreleases in the cluster role loft-cluster-extra-space-admin-rules.
Create a app.yaml in the following form:
apiVersion: storage.loft.sh/v1
kind: App
metadata:
  name: my-app
spec:
  description: My app description
  recommendedApp:
    - space
    - cluster
  manifests: |-
    apiVersion: v1
    kind: Pod
    metadata:
      name: loft-e2e-2
    spec:
      restartPolicy: Never
      containers:
        - image: busybox
          name: e2e
          command: ["sh"]
          args: ["-c", "exit 0"]
  access: []
Then apply the app to the cluster where Loft was installed with:
kubectl apply -f app.yaml
Delete an App
You can either delete an app through the Loft UI or use kubectl. Deleting an app will not delete any already deployed instances of this app.
- UI
- kubectl
Navigate to Apps. Then click on the 'Delete' button.
Delete the app my-app by running the following command in the cluster where Loft is installed in:
kubectl delete app my-app
Install Apps
Installing apps essentially runs helm install.
Upgrade Apps
You can upgrade (or downgrade) your apps in the UI which essentially performs a helm upgrade. Upgrading apps is also useful to change the configuration of an app (helm values).
Uninstall Apps
Uninstalling an app essentially performs helm delete.
Customization
Change Helm App Repositories
You can customize which Helm repositories should be crawled by Loft. This can be done in the "Admin > Config" tab. In the textbox you can change the apps settings. You have several options to customize how Loft will crawl the Helm repositories:
#
# Specify additional Helm repositories. After you change something here and press apply, loft will recrawl
# all repositories and show them in the Apps views. Please be patient, this can take
# some time.
#
apps:
  # If this option is true, loft will not parse any default repositories
  noDefault: false
  # Additional repositories that should be parsed. Not affected by the noDefault option
  repositories:
      # The name of the repository. Charts will be shown as name/chart in the UI
    - name: repo
      # The url to the repository. The index.yaml will be appended automatically
      url: http://url-to-repo.com
For example, if you want to add your own helm chart repository you can specify it via:
apps:
  # If you want to skip the helm repositories recommended by loft
  # (https://github.com/loft-sh/loft/blob/master/appstore/repos.yaml)
  # noDefault: true
  repositories:
    - name: my-custom-repo
      url: 'https://my.custom.repo.com/repo'
Apps crawled from the repository will then be shown as my-custom-repo/chart within the Apps views.

Convert an existing Helm Release
In Helm v3, Helm creates a Kubernetes secret for each Helm release that contains details about the release. To view such secrets you can execute in the cluster:
# Show all deployed helm releases in the cluster
kubectl get secrets --selector=owner=helm,status=deployed --all-namespaces
In order for Loft to display the Helm releases as apps in the Loft UI, the secret needs a label called loft.sh/app: true.
To query the Helm releases Loft will display in the UI, you can run:
# Show all deployed helm releases in the cluster that are marked as loft apps
kubectl get secrets --selector=owner=helm,status=deployed,loft.sh/app=true --all-namespaces
Additionally, there is the label loft.sh/system-app: true and the annotation loft.sh/url: REPO_URL to provide additional loft specific details about the app.
Sometimes, it can be useful to "import" an already existing Helm chart by adding the missing labels and annotations. This has the advantage that you can view and manage the Helm release using the Loft UI. With the helper script import-helm-release, you can import Helm releases into Loft.
tip
If you connected the management cluster (that Loft is running in), you can:
Import cert-manager:
curl -L "https://raw.githubusercontent.com/loft-sh/loft/master/hack/import-helm-release.sh" | bash -s -- "cert-manager" "https://charts.jetstack.io"
Import nginx-ingress:
curl -L "https://raw.githubusercontent.com/loft-sh/loft/master/hack/import-helm-release.sh" | bash -s -- "ingress-nginx" "https://kubernetes.github.io/ingress-nginx"
Import loft and label it as system app:
curl -L "https://raw.githubusercontent.com/loft-sh/loft/master/hack/import-helm-release.sh" | bash -s -- "loft" "https://charts.loft.sh" true false